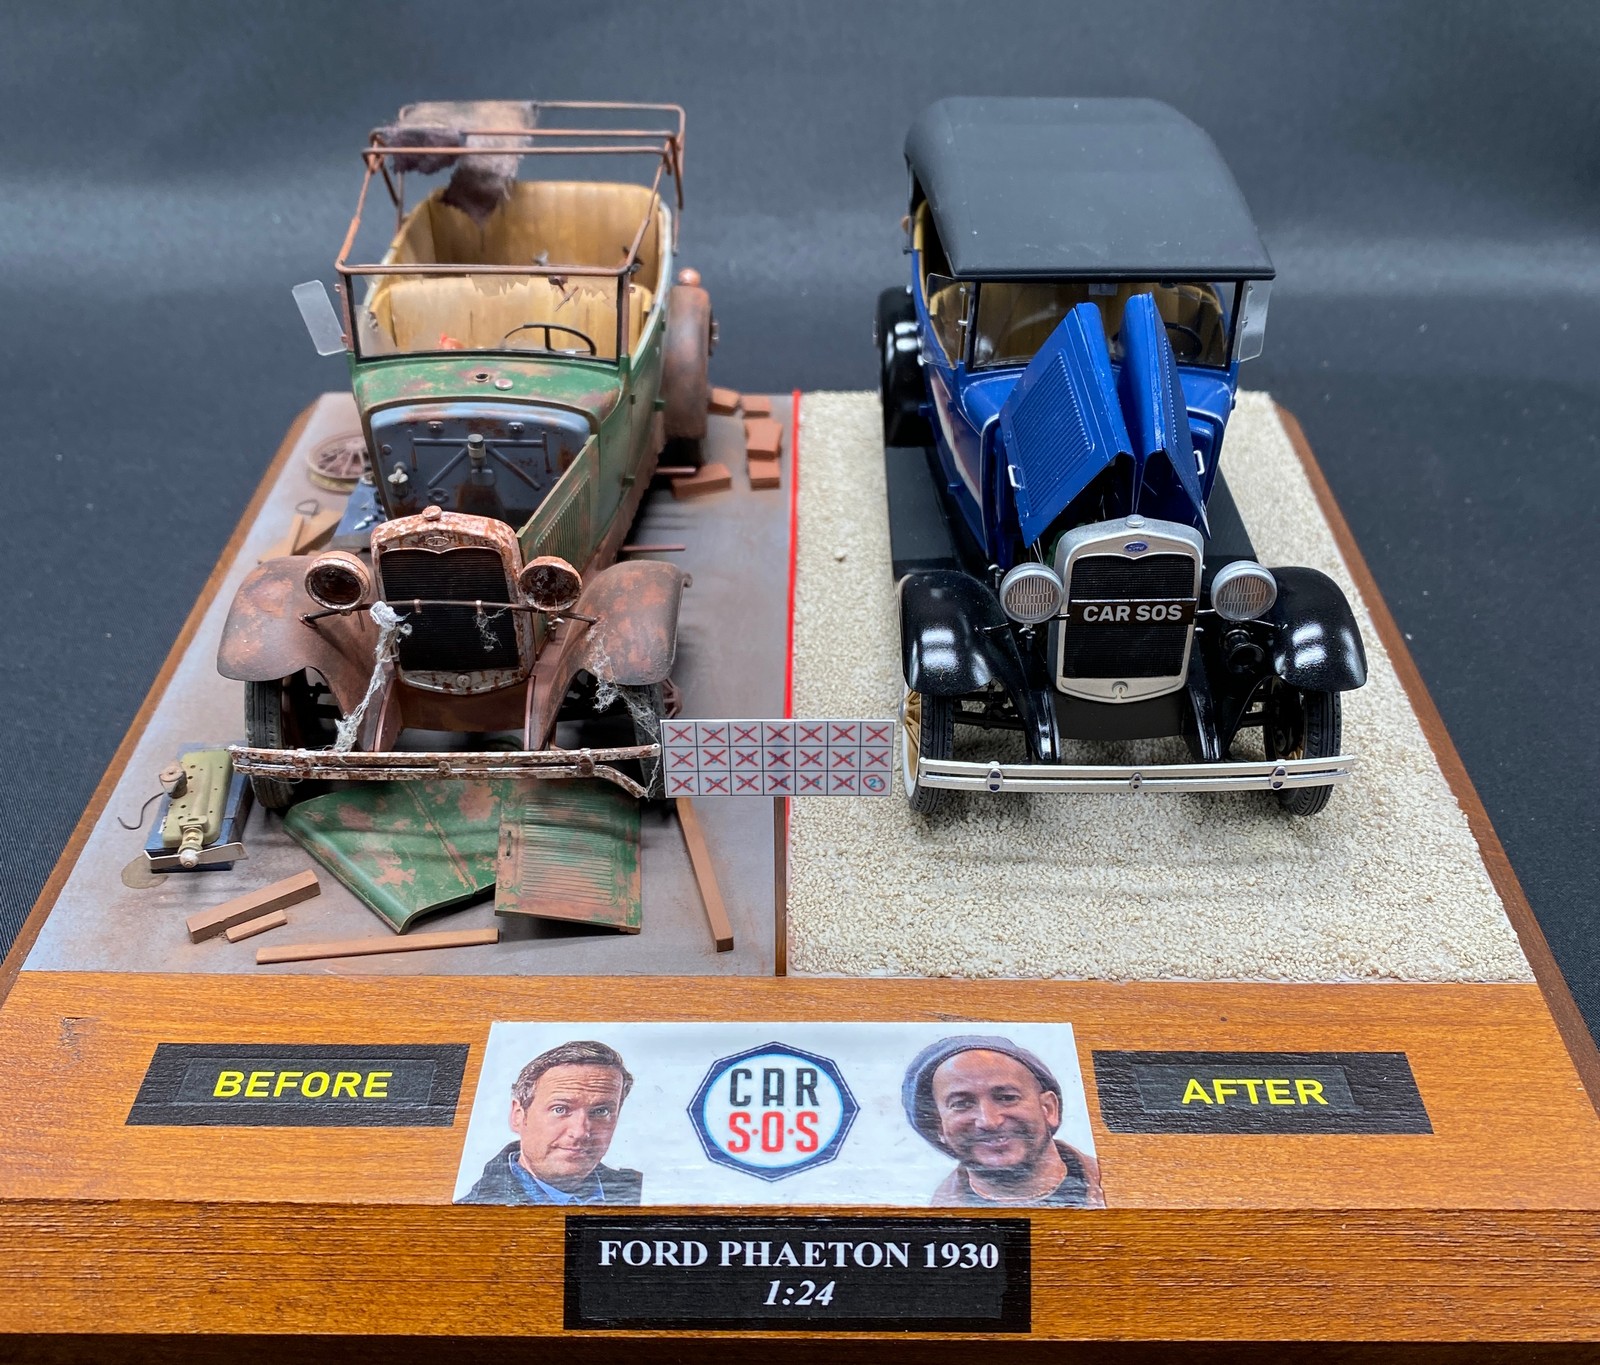
Jarda „Sheya“ Šebek
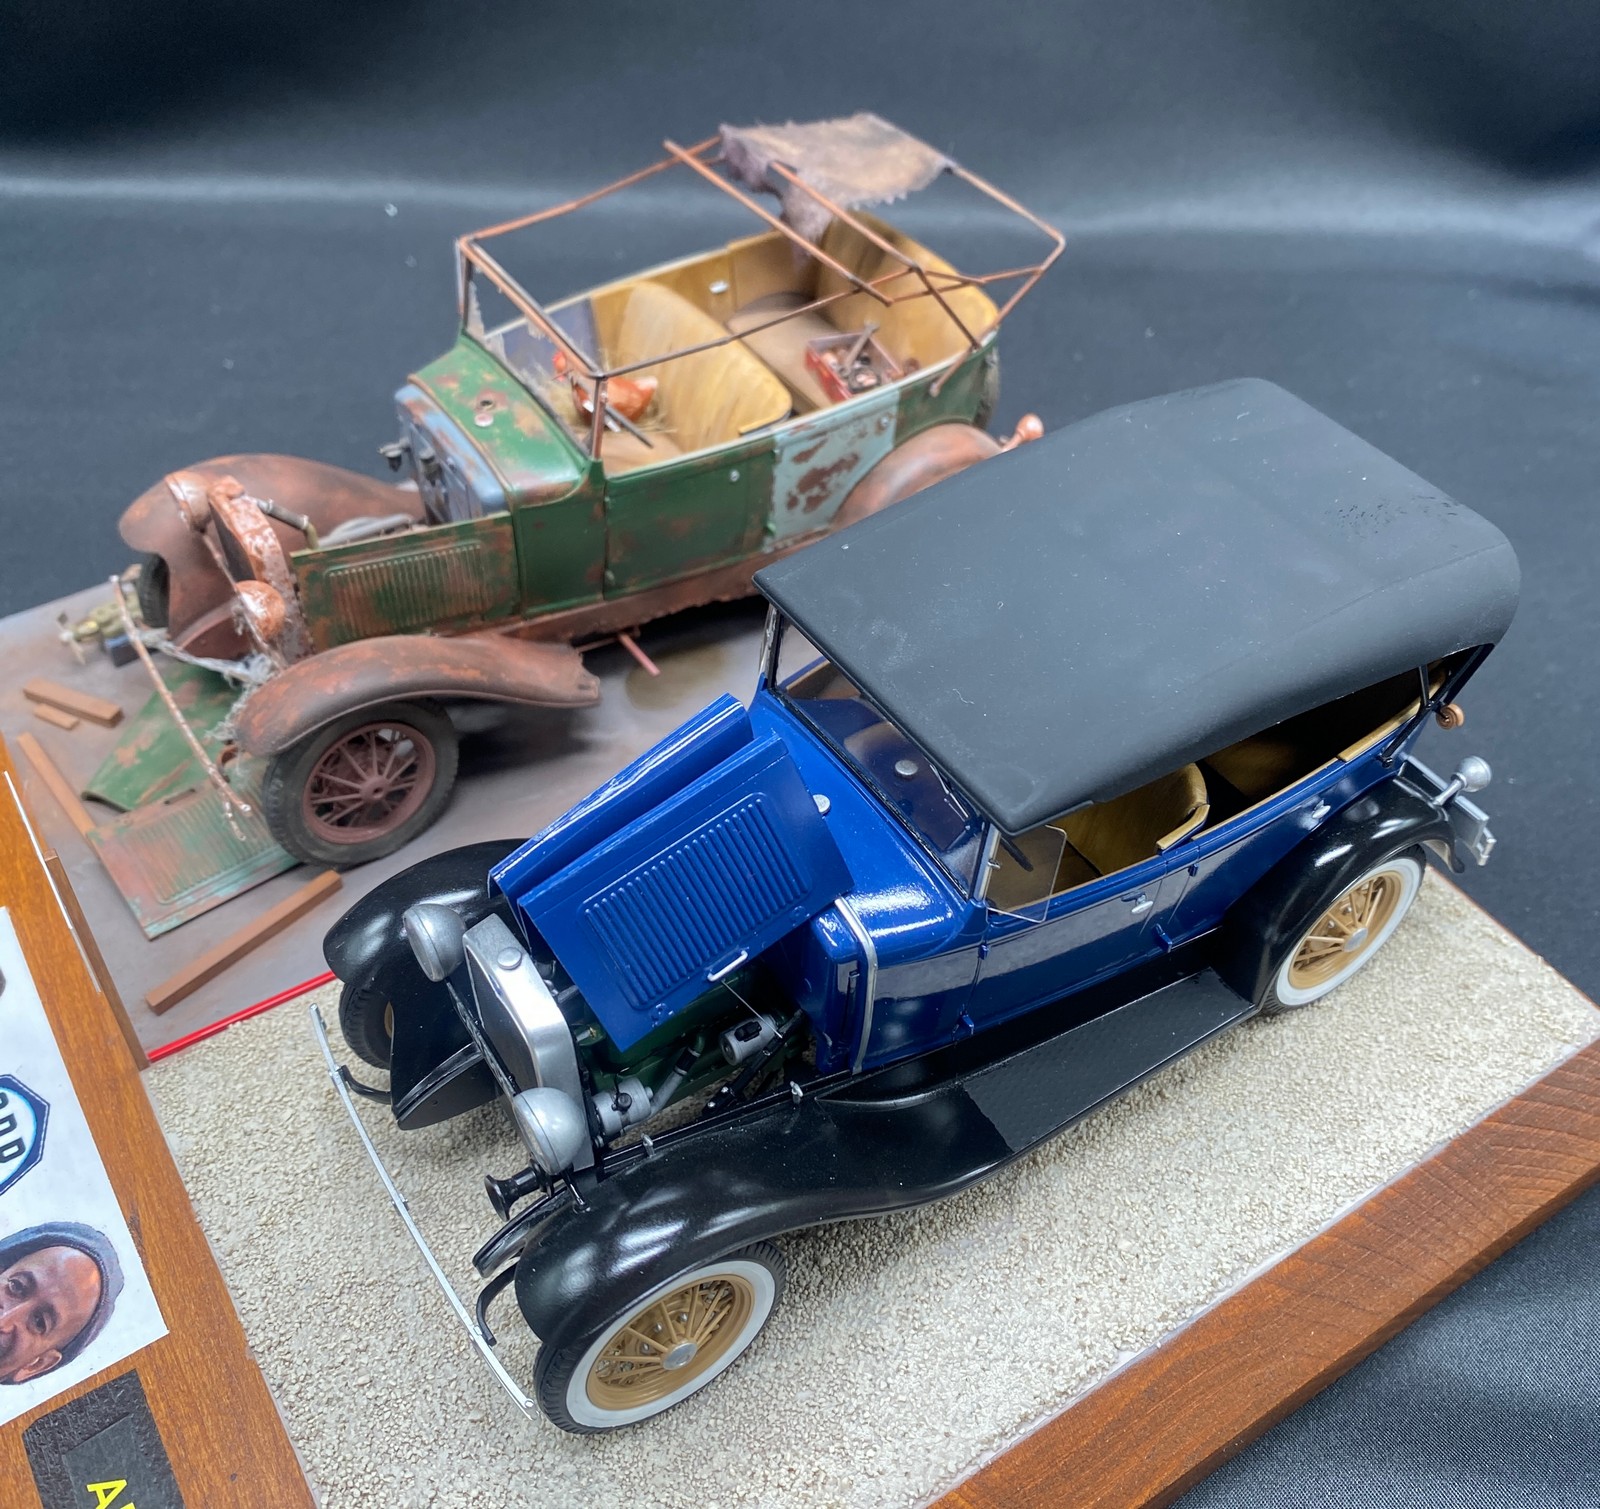
Almost every modeler has tried, with greater or lesser success, to create the impression that this is not a new machine, the so-called patina. But how to show that it is a real wreck? That was something I wanted to try. Rusted, decayed parts, decayed wood, etc. An old car was a suitable object. I chose a 1930 Ford Phaeton from ICM in 1:24 scale. But it is such a beautiful car that I was sorry to have it only as a wreck. It meant buying two kits and building the second one as a new "polished one". And then an idea came to me. I remembered the show CAR S.O.S. (in our country it is broadcast under the name "Help the Cars"). Two mechanics Tim and Fuzz always secretly repair the car within three weeks (after consulting with relatives) and then hand it over to the surprised owner after repair. So it was decided - the model will be in the style of this show.
I had to decide what to do with the kit. Broken glass, flat tire, missing tire, open engine, rusted metal sheets, leaky seats… There were a lot of ideas, so I made a whole list. But I had to reduce it a lot later. First of all, it would be almost impossible to tell that it was originally a car, and the whole project would also take at least a year. The photos that a group of enthusiasts from India posted on the website helped me a lot. They were reconstructing this particular car, and the detailed photos were invaluable to me.
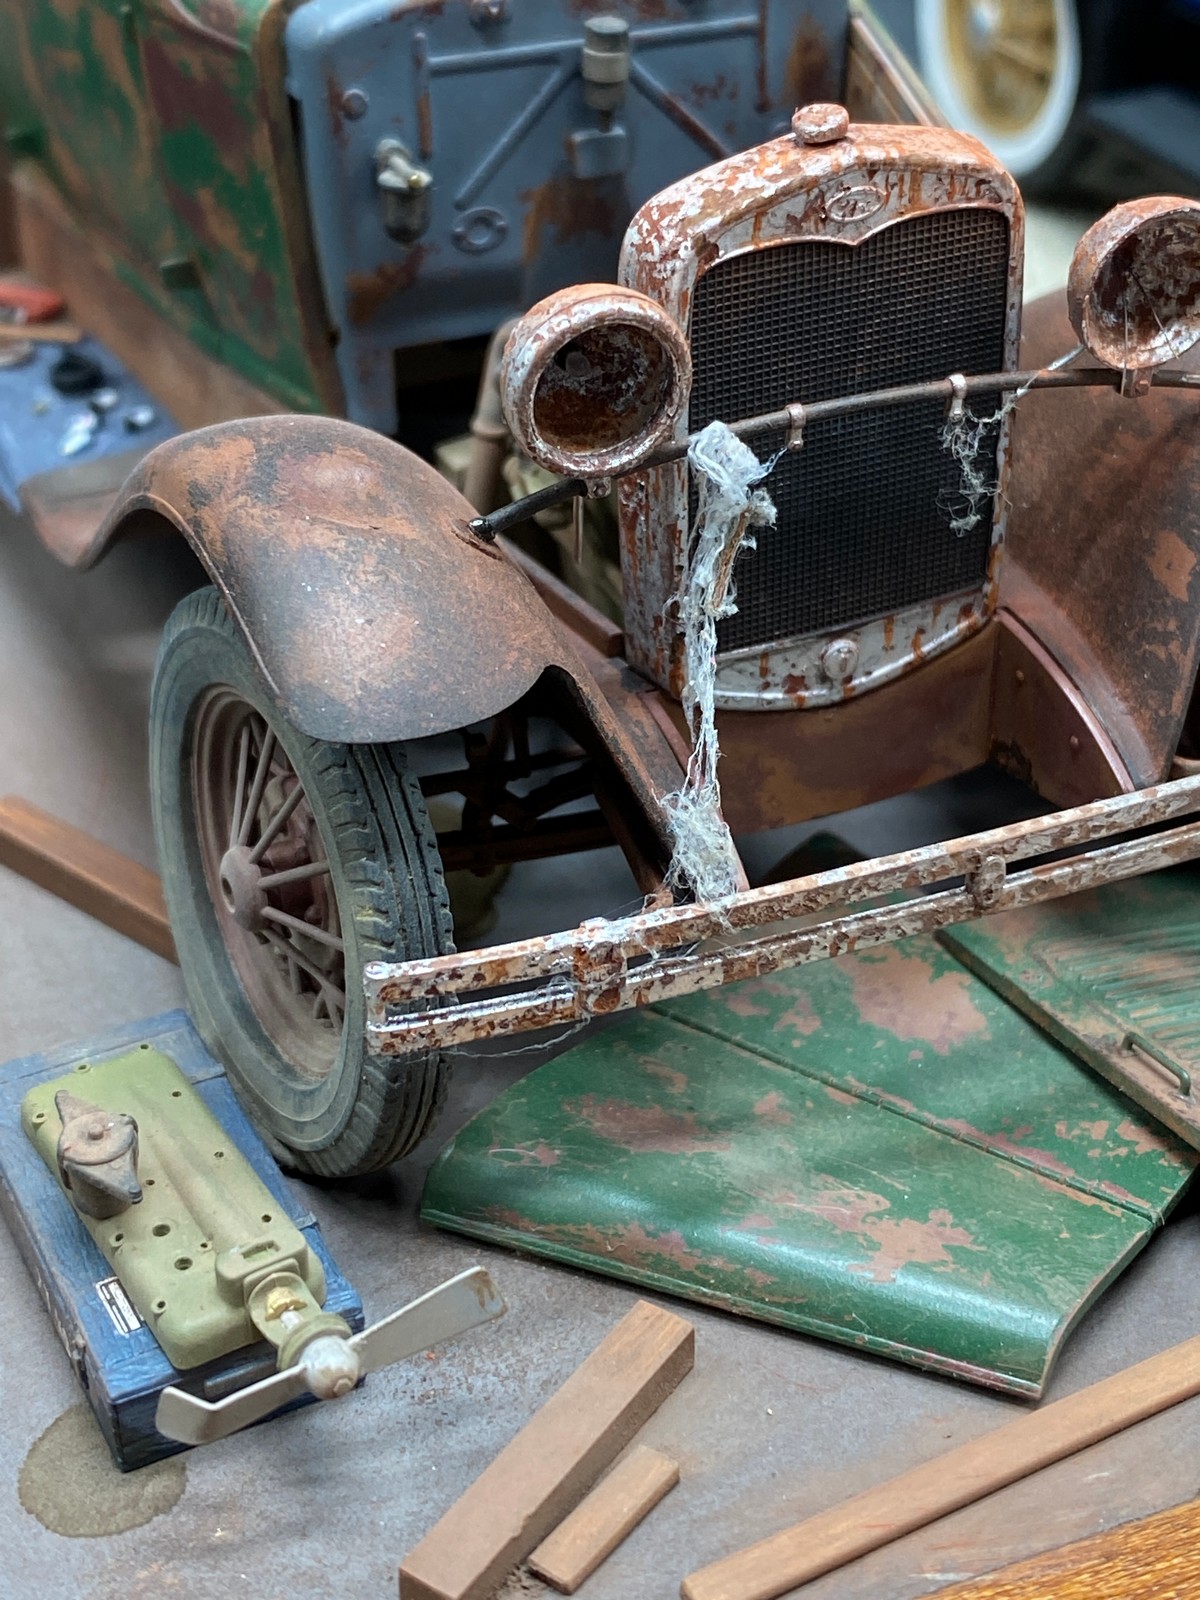
I started studying the techniques of so-called “chipping”, i.e. the plastic representation of cutting. It meant spending hours and hours watching videos on the Internet and seeing how others do it. There are a whole range of these techniques. I finally decided to try two – chipping with salt and chipping with professionally produced products.
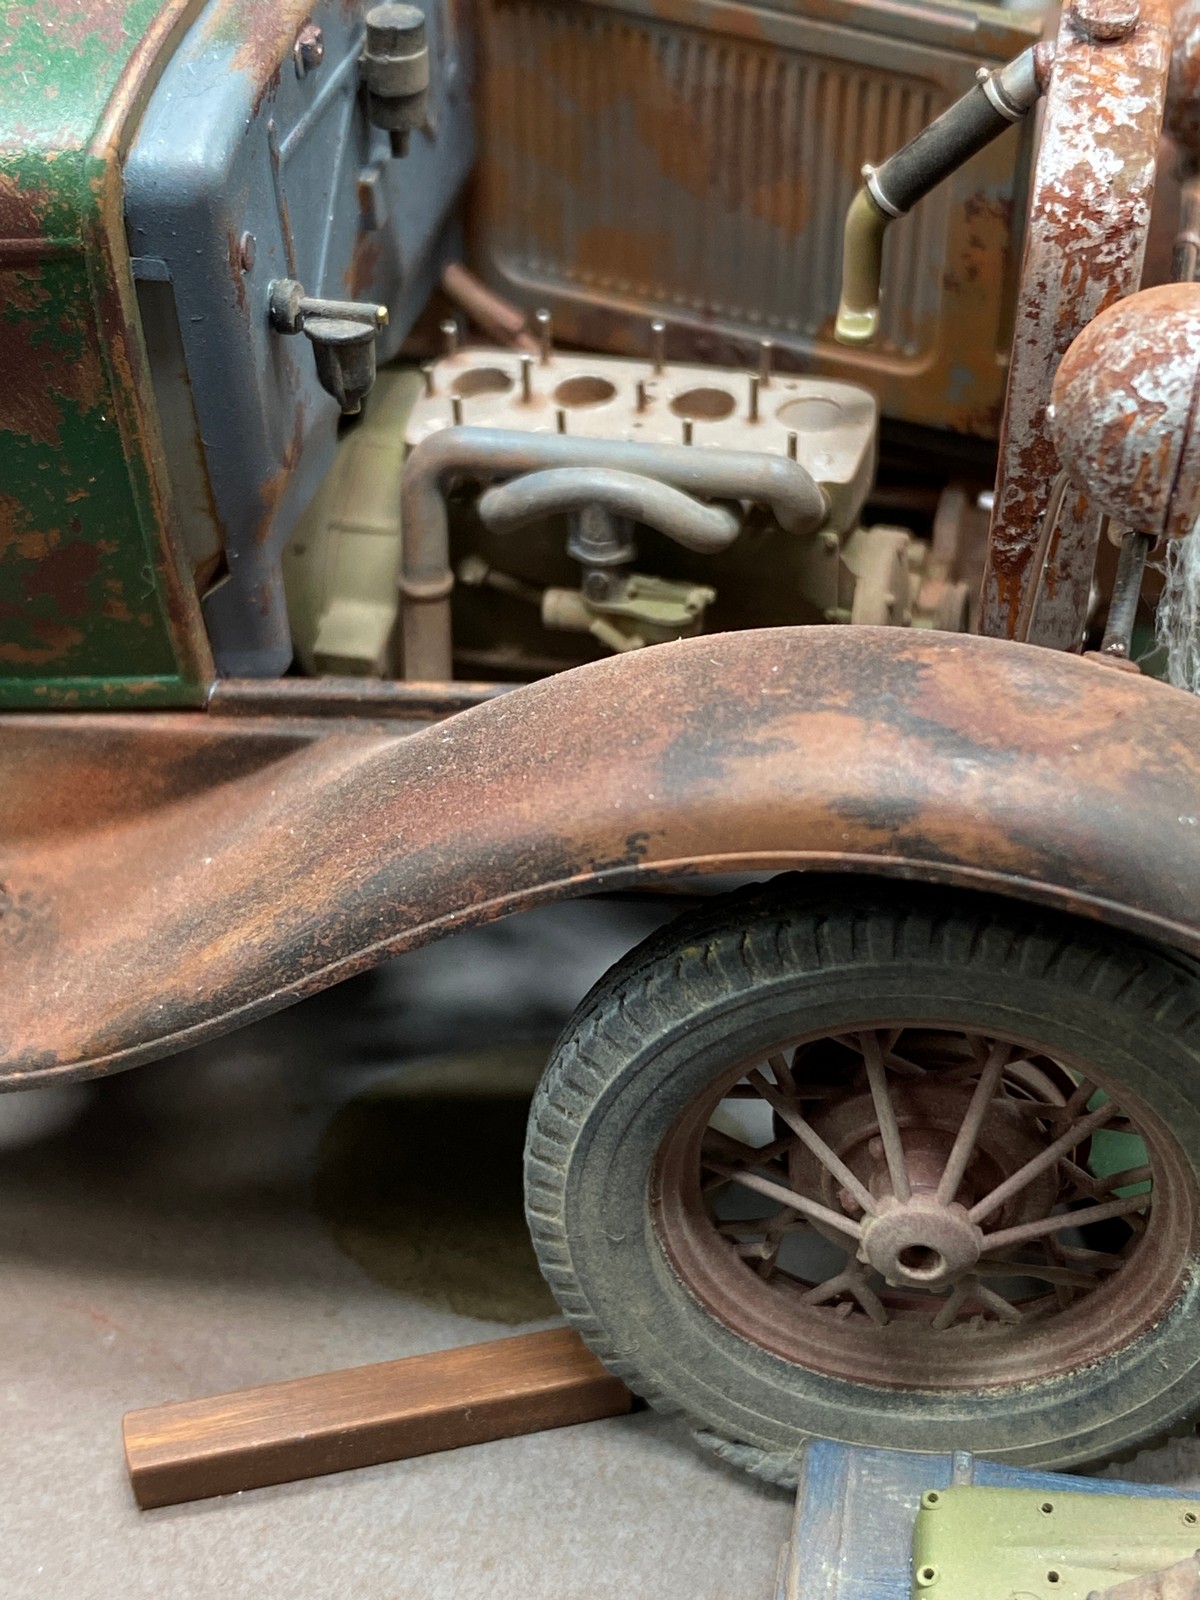
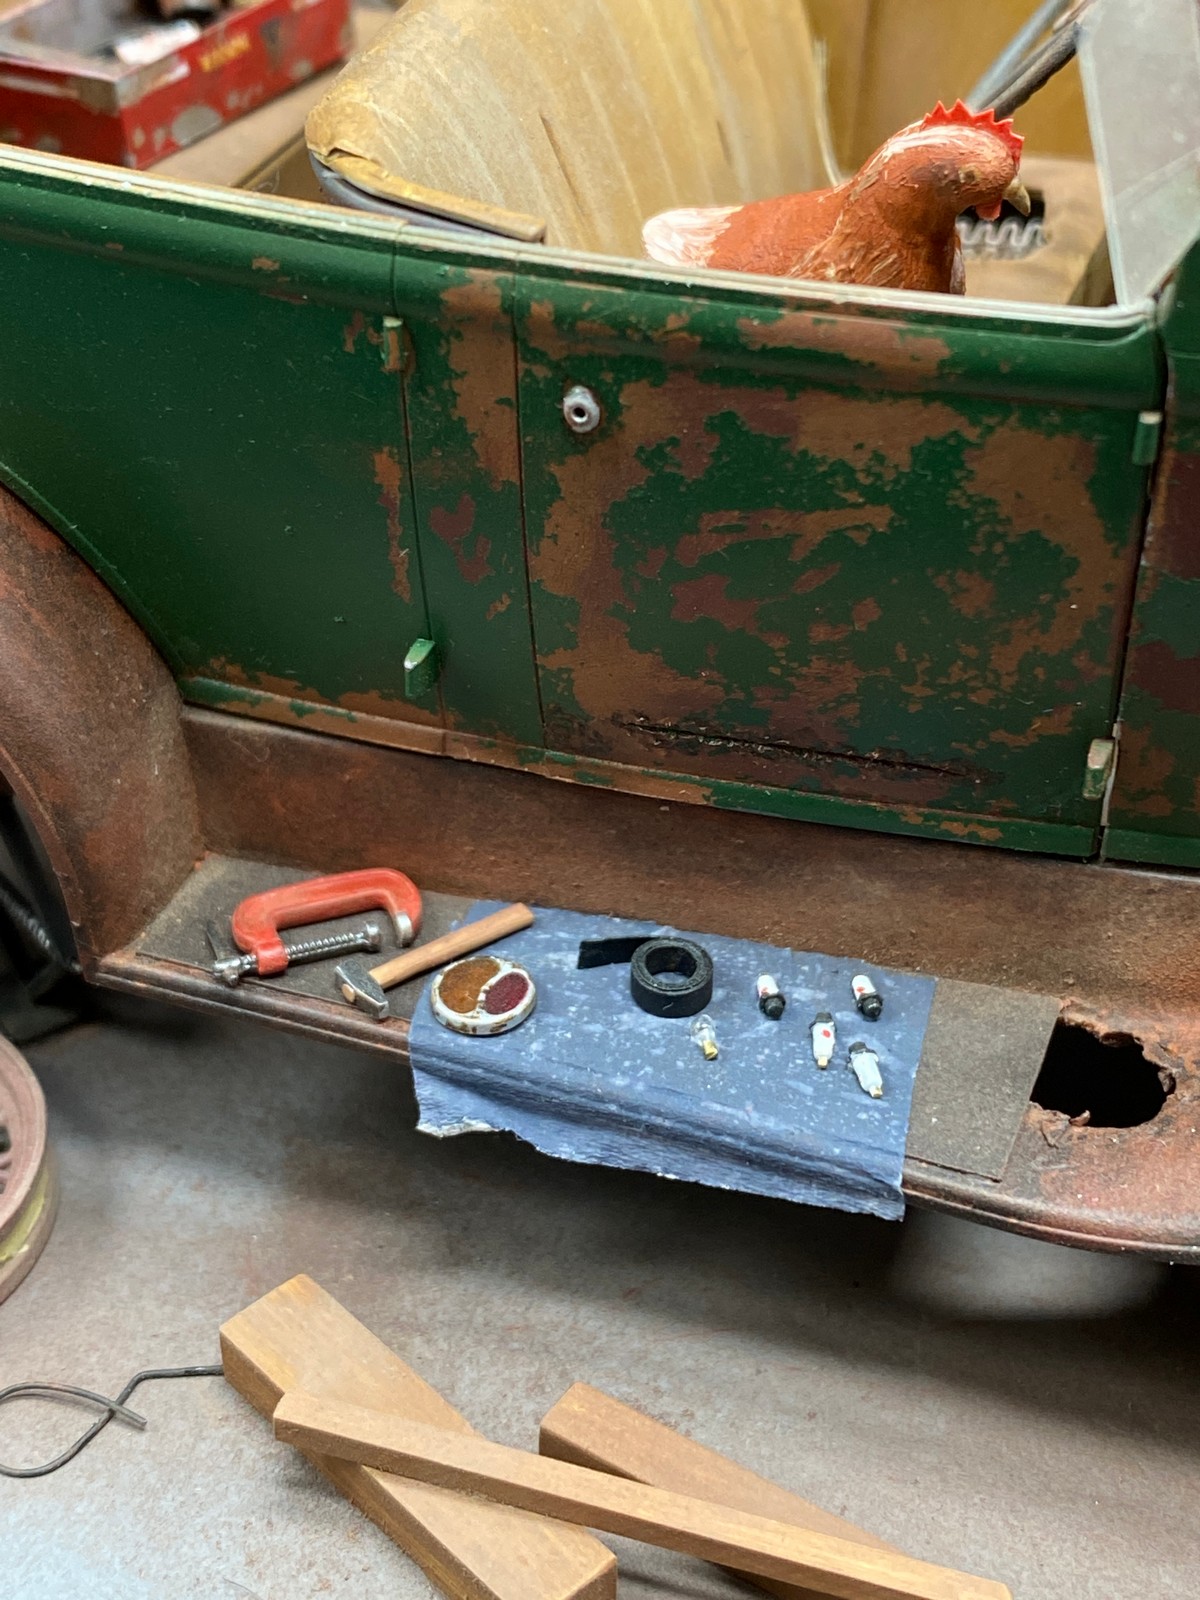
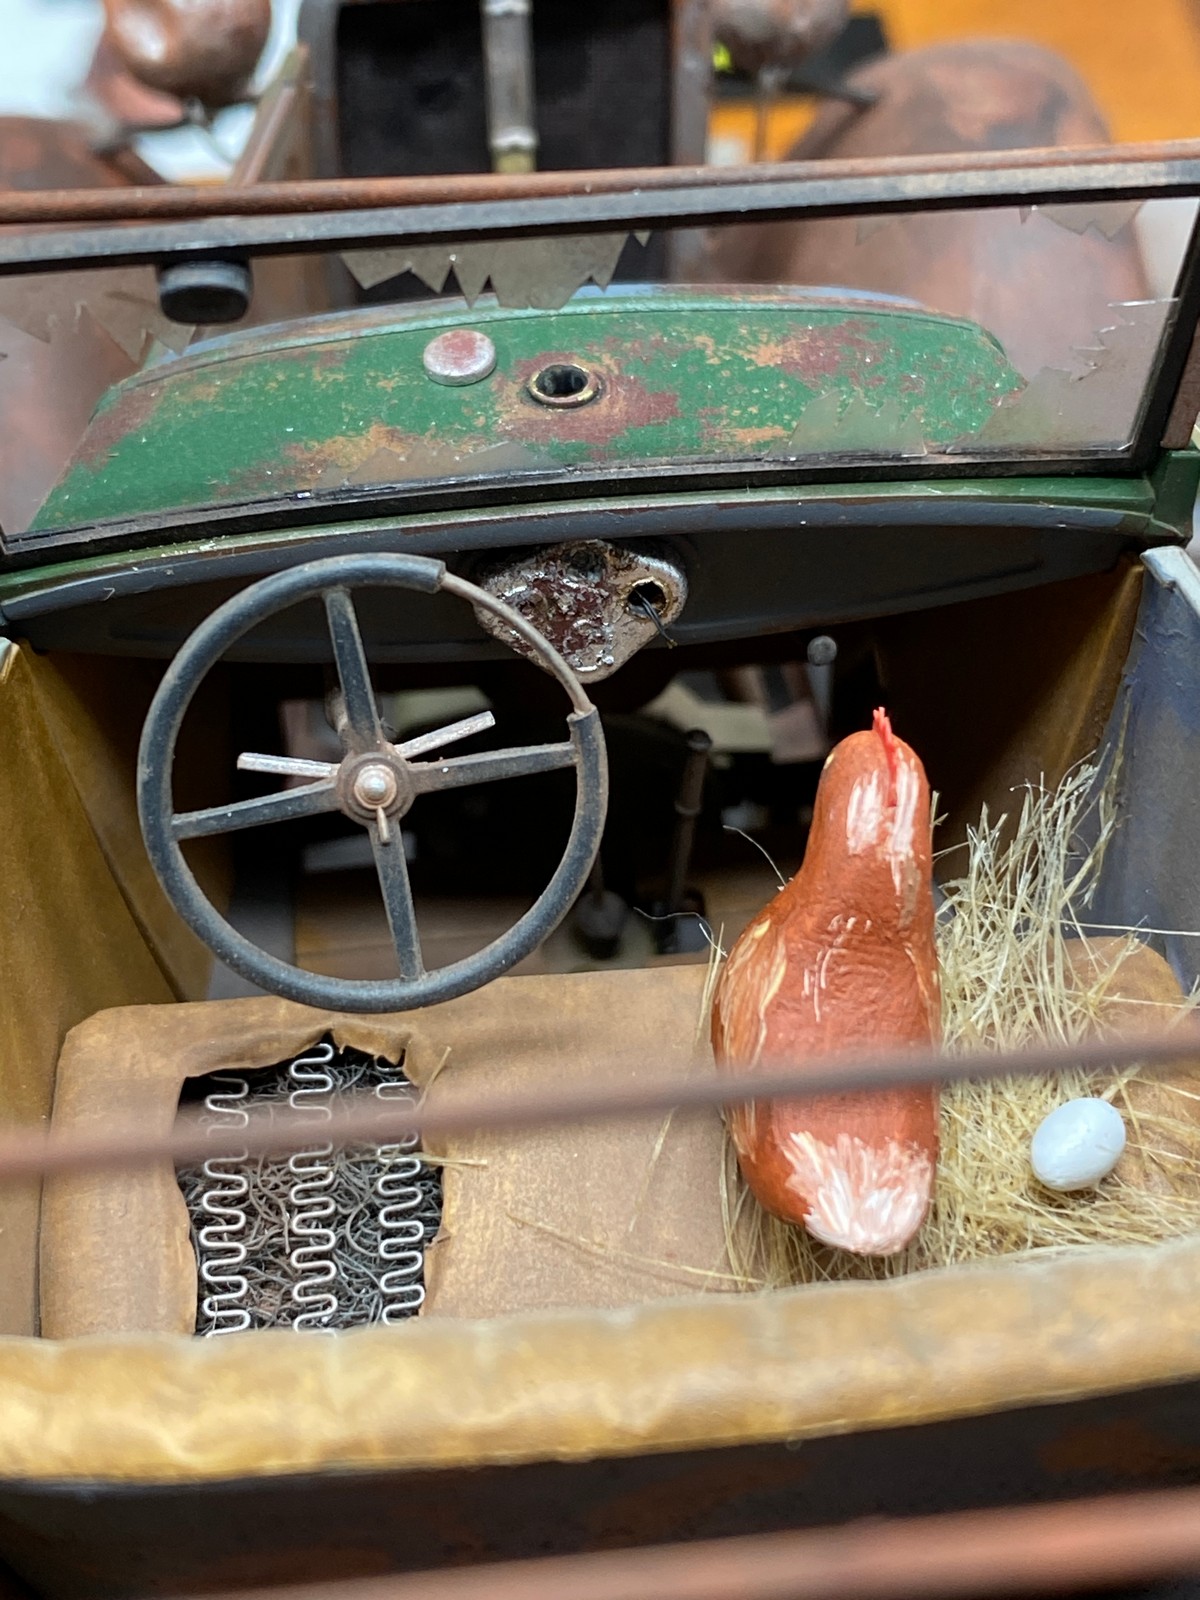
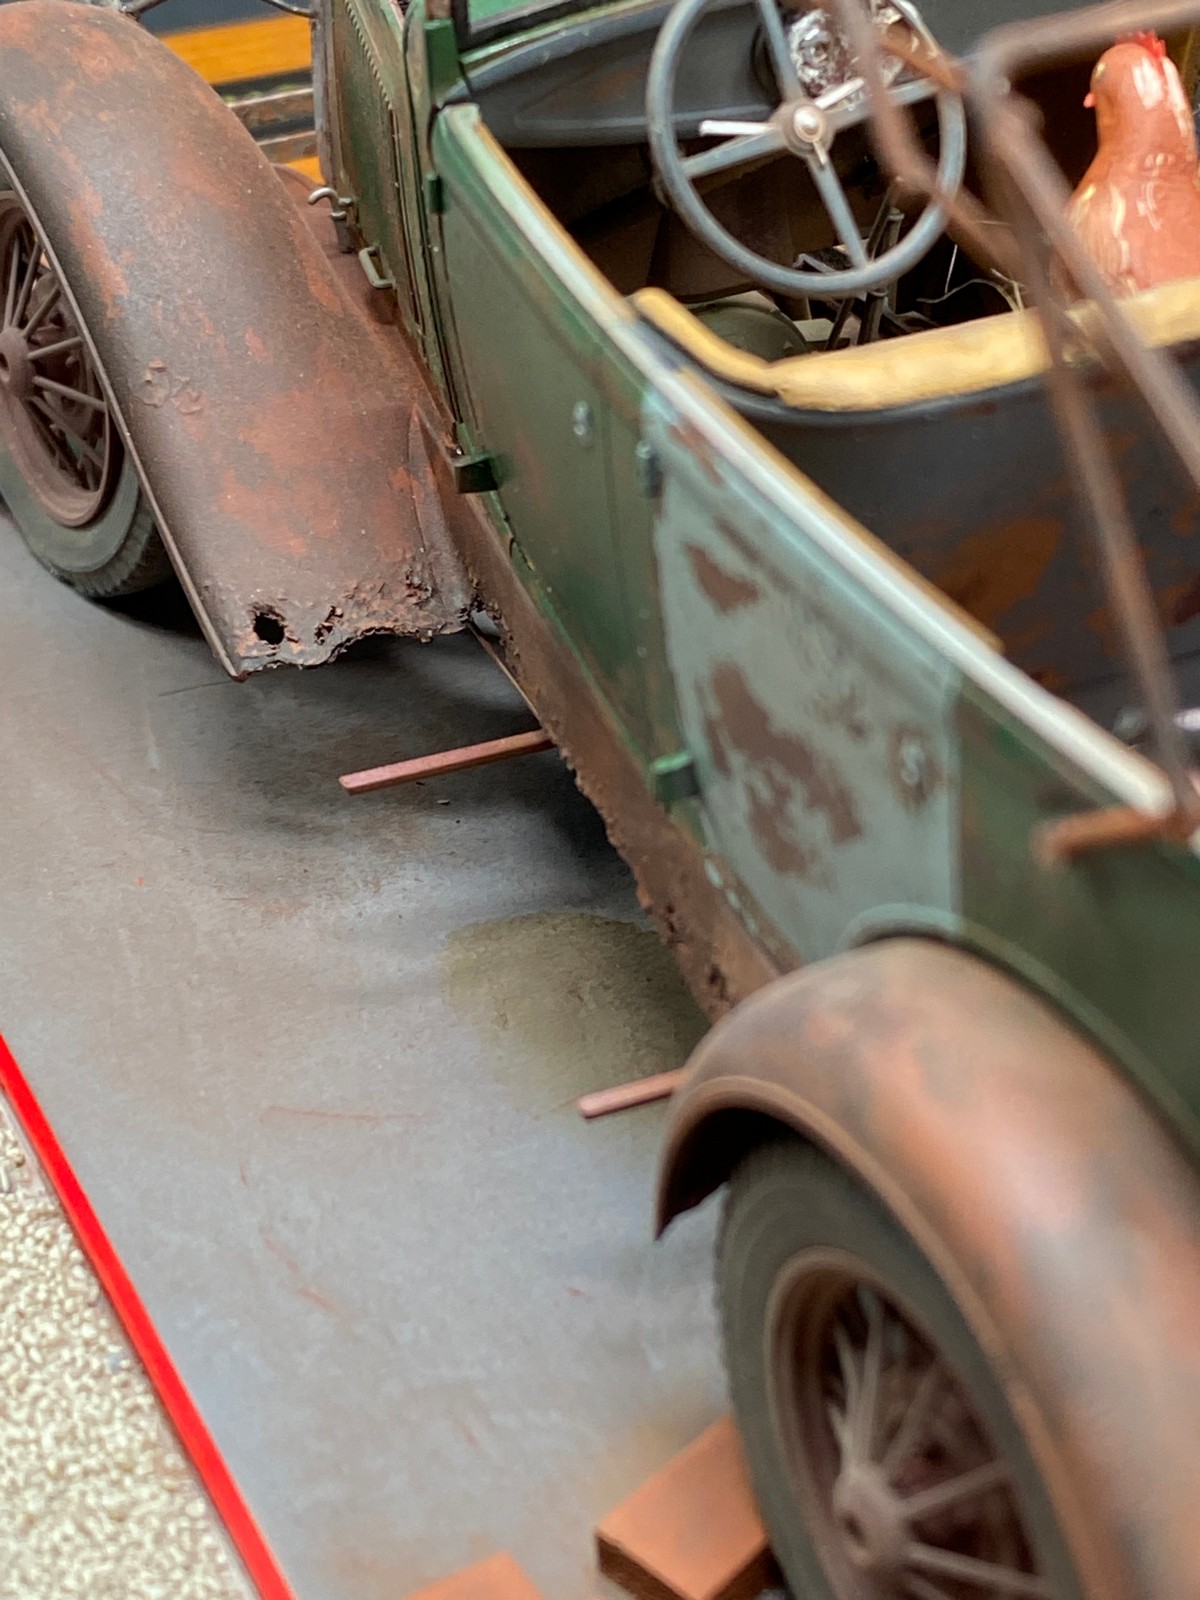
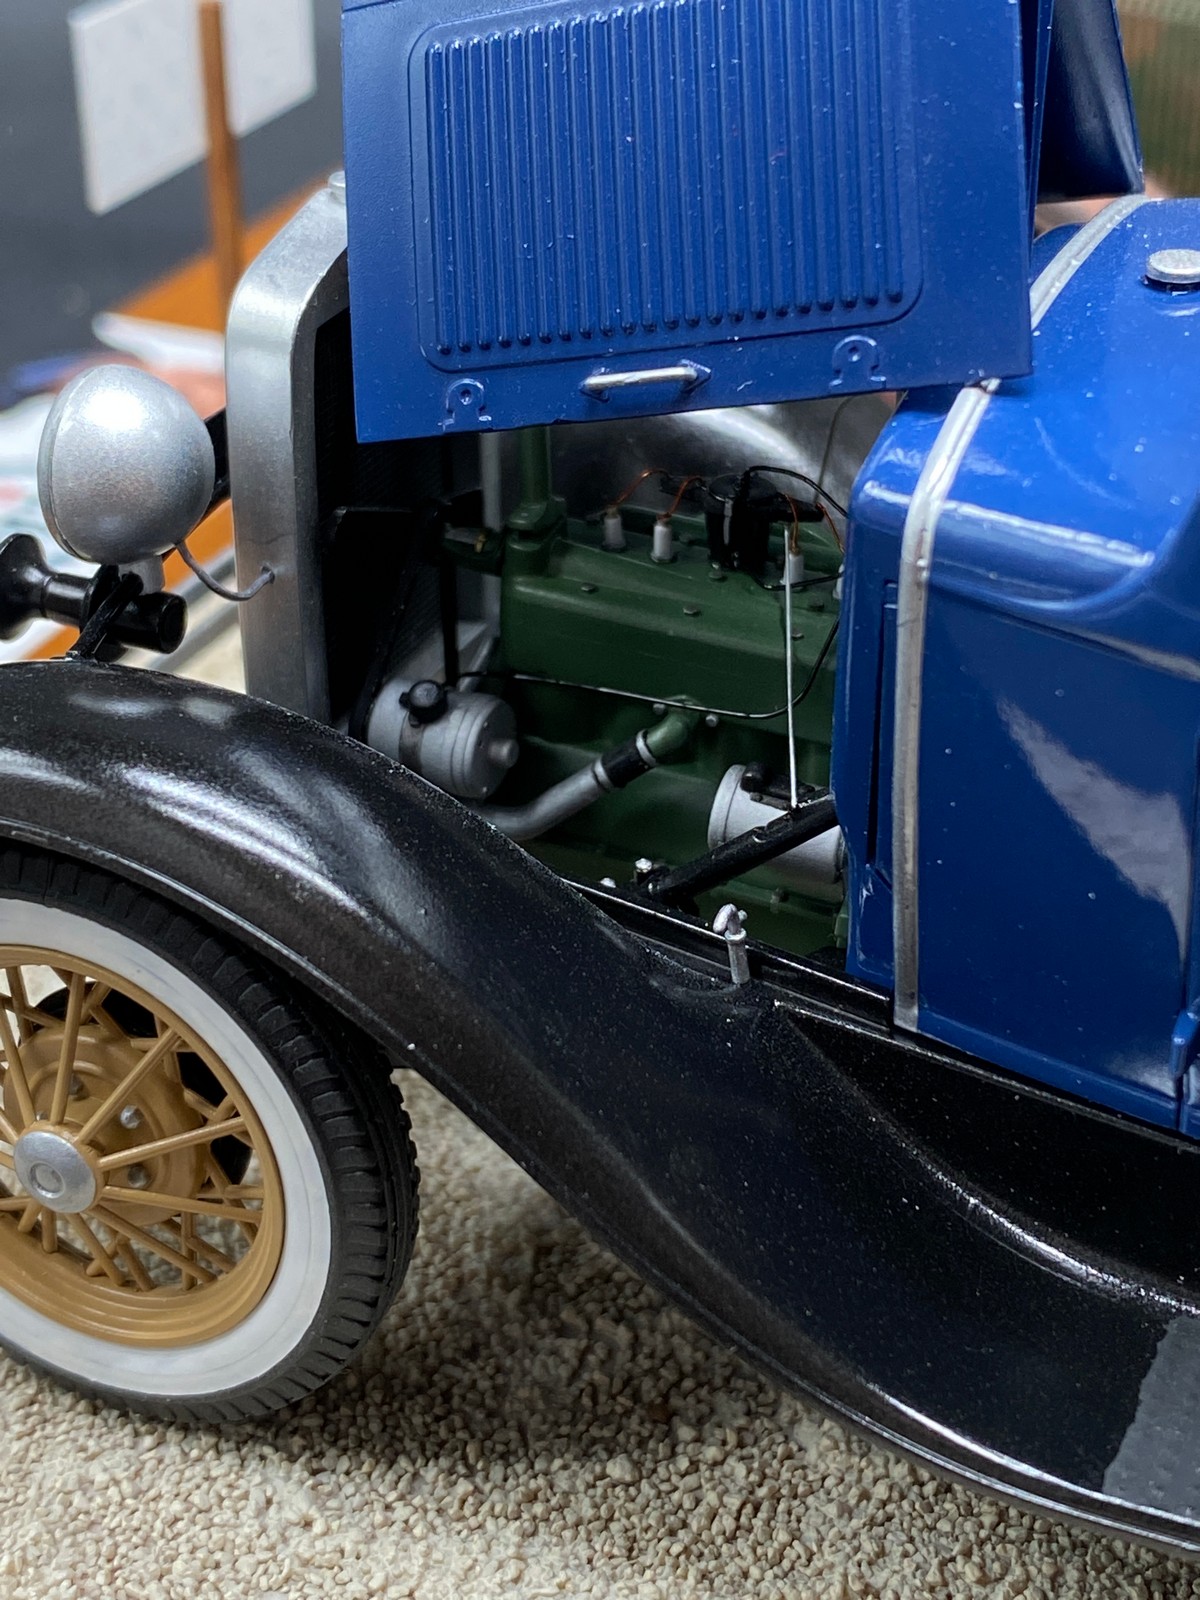
If you look closely at a car wreck, you will notice that rust looks different on chrome parts and on painted parts. On chrome parts (e.g. headlights) I used chipping salt, which is more plastic, and on other surfaces I used special Vallejo products. I represented the rusting of the fenders by gradually milling off the material with a round dental milling cutter. You need to proceed very carefully and only at slow speeds so that the plastic does not start to melt. I imitated the rust under the paint, which "blows off" the paint from the base, with a gel polish. I tried everything out several times beforehand on unused parts from other kits. I represented the rust color itself with dry pigments.
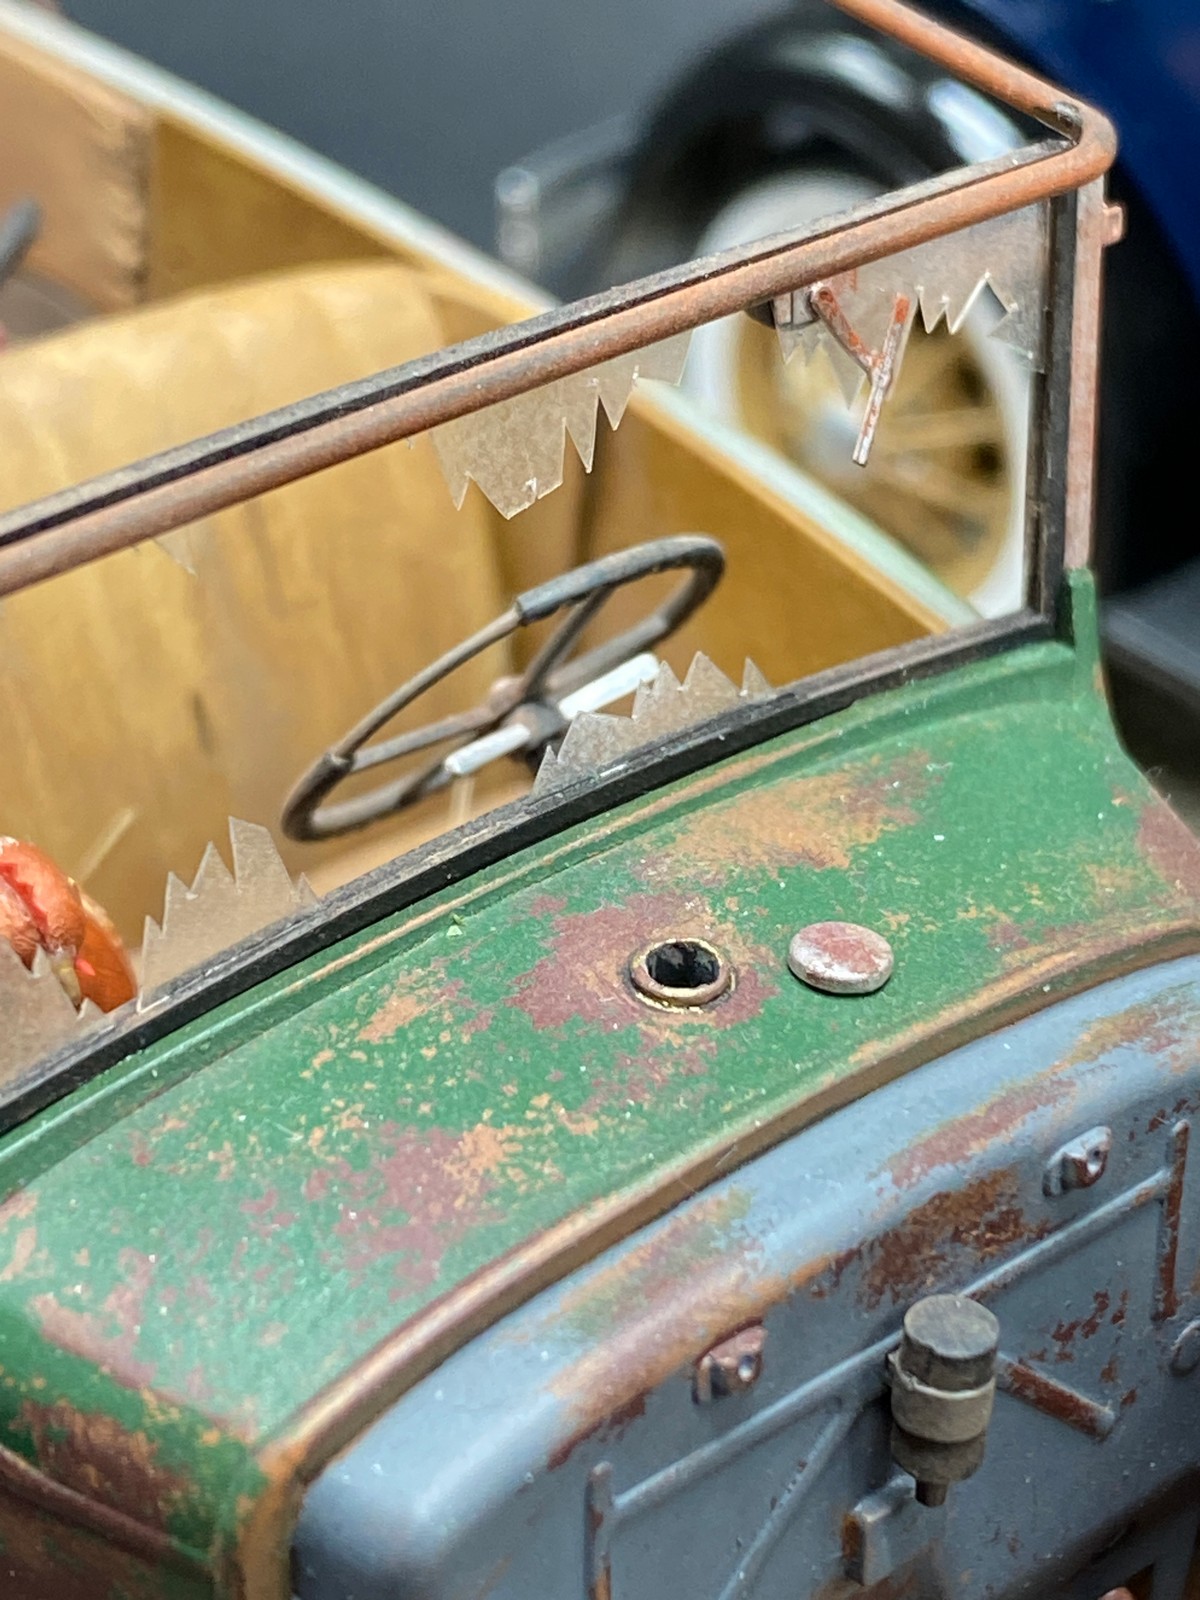
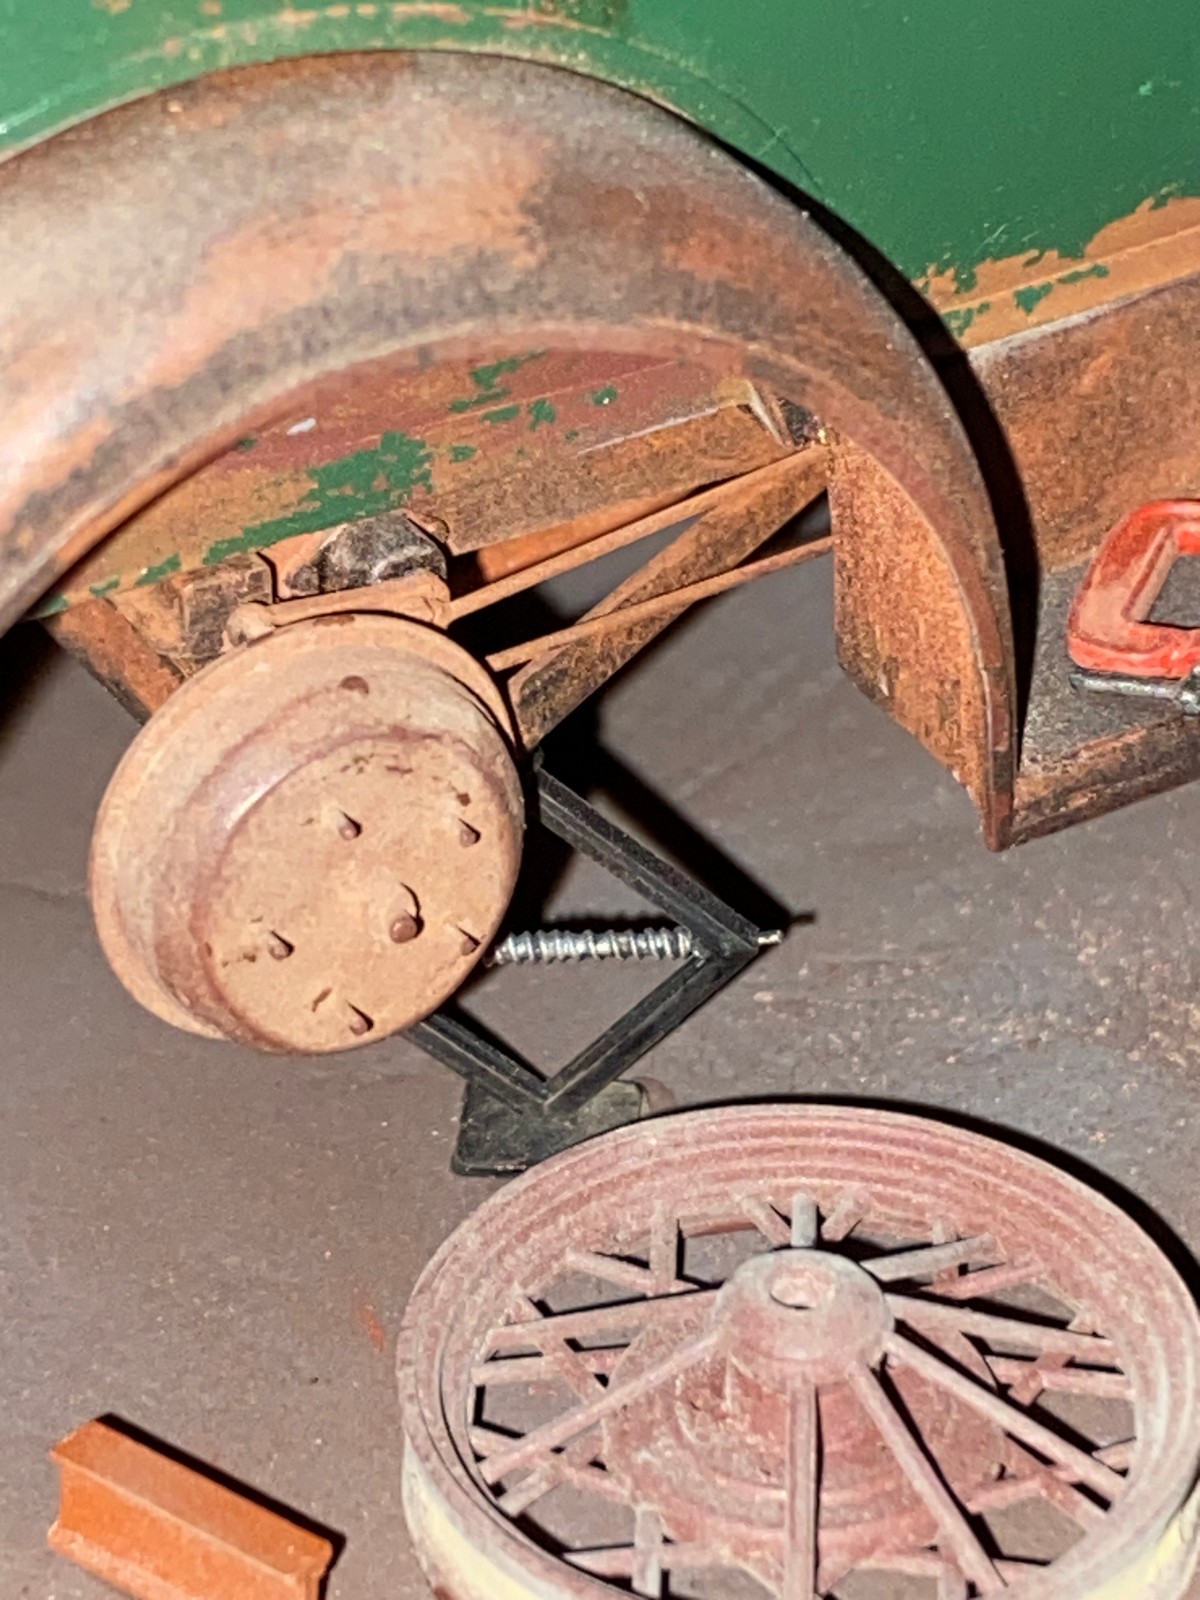
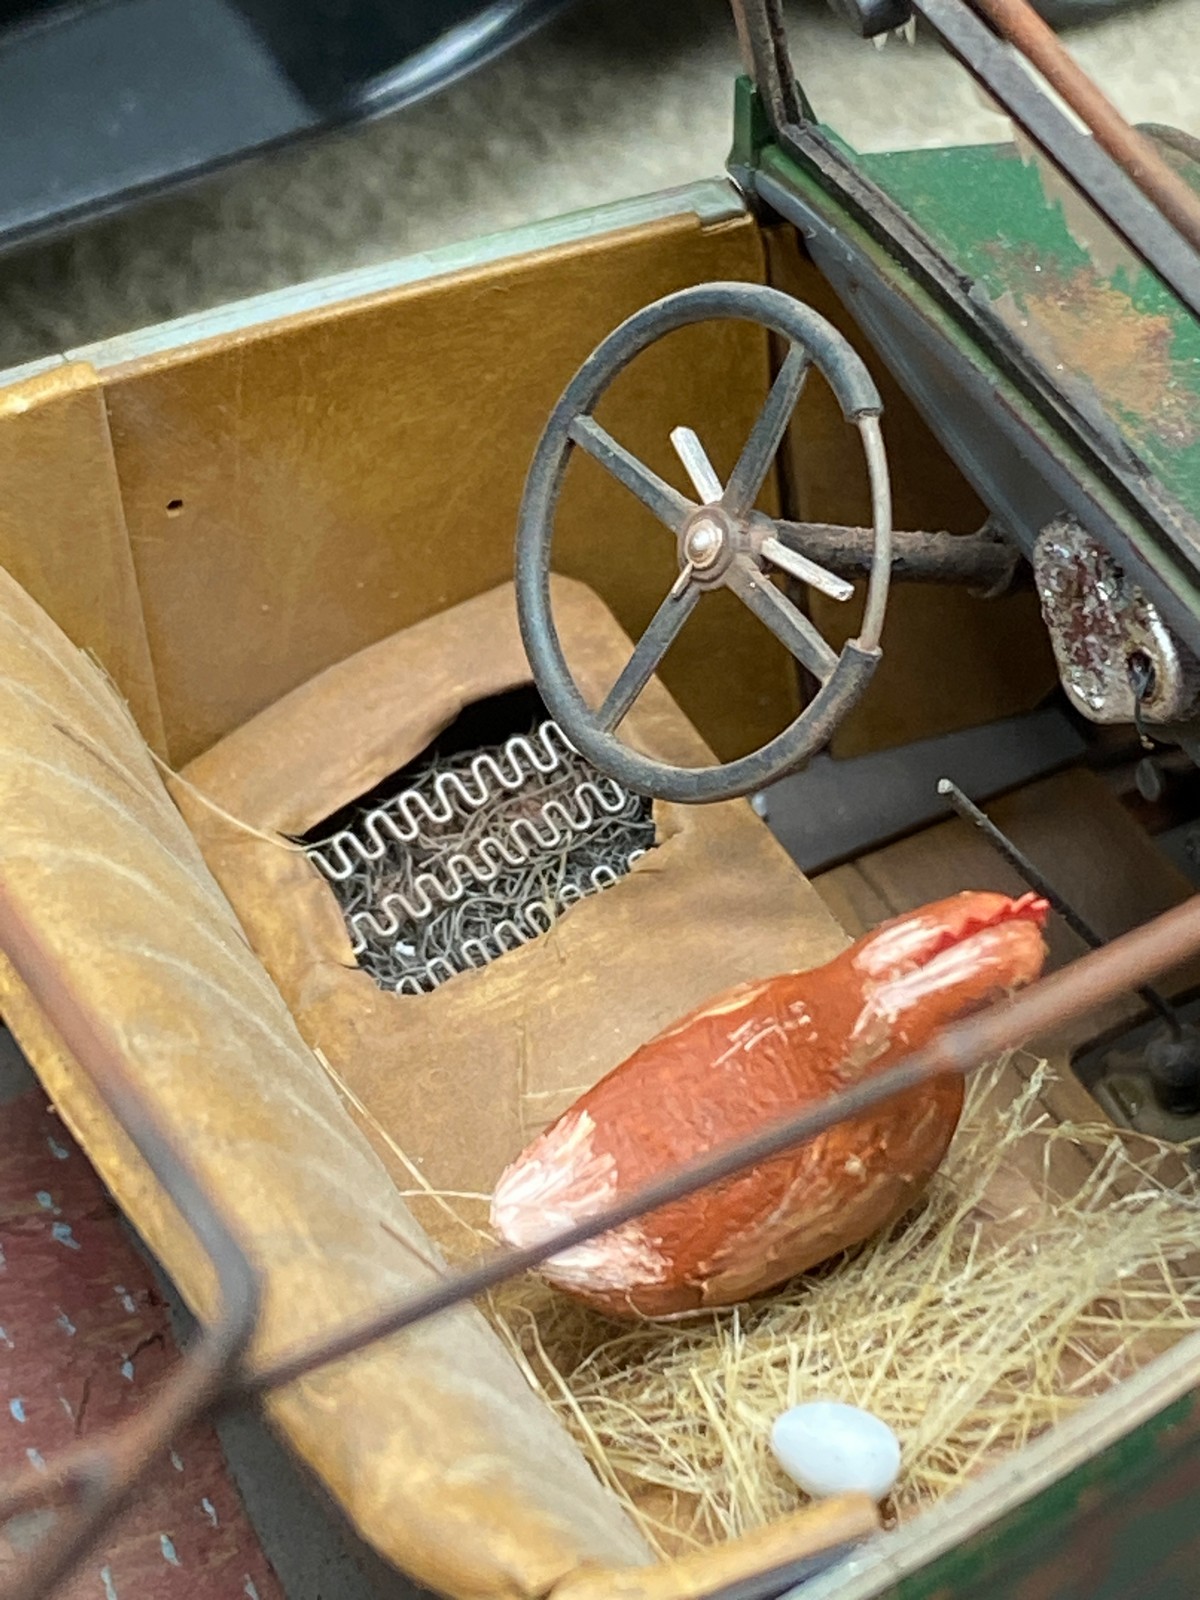
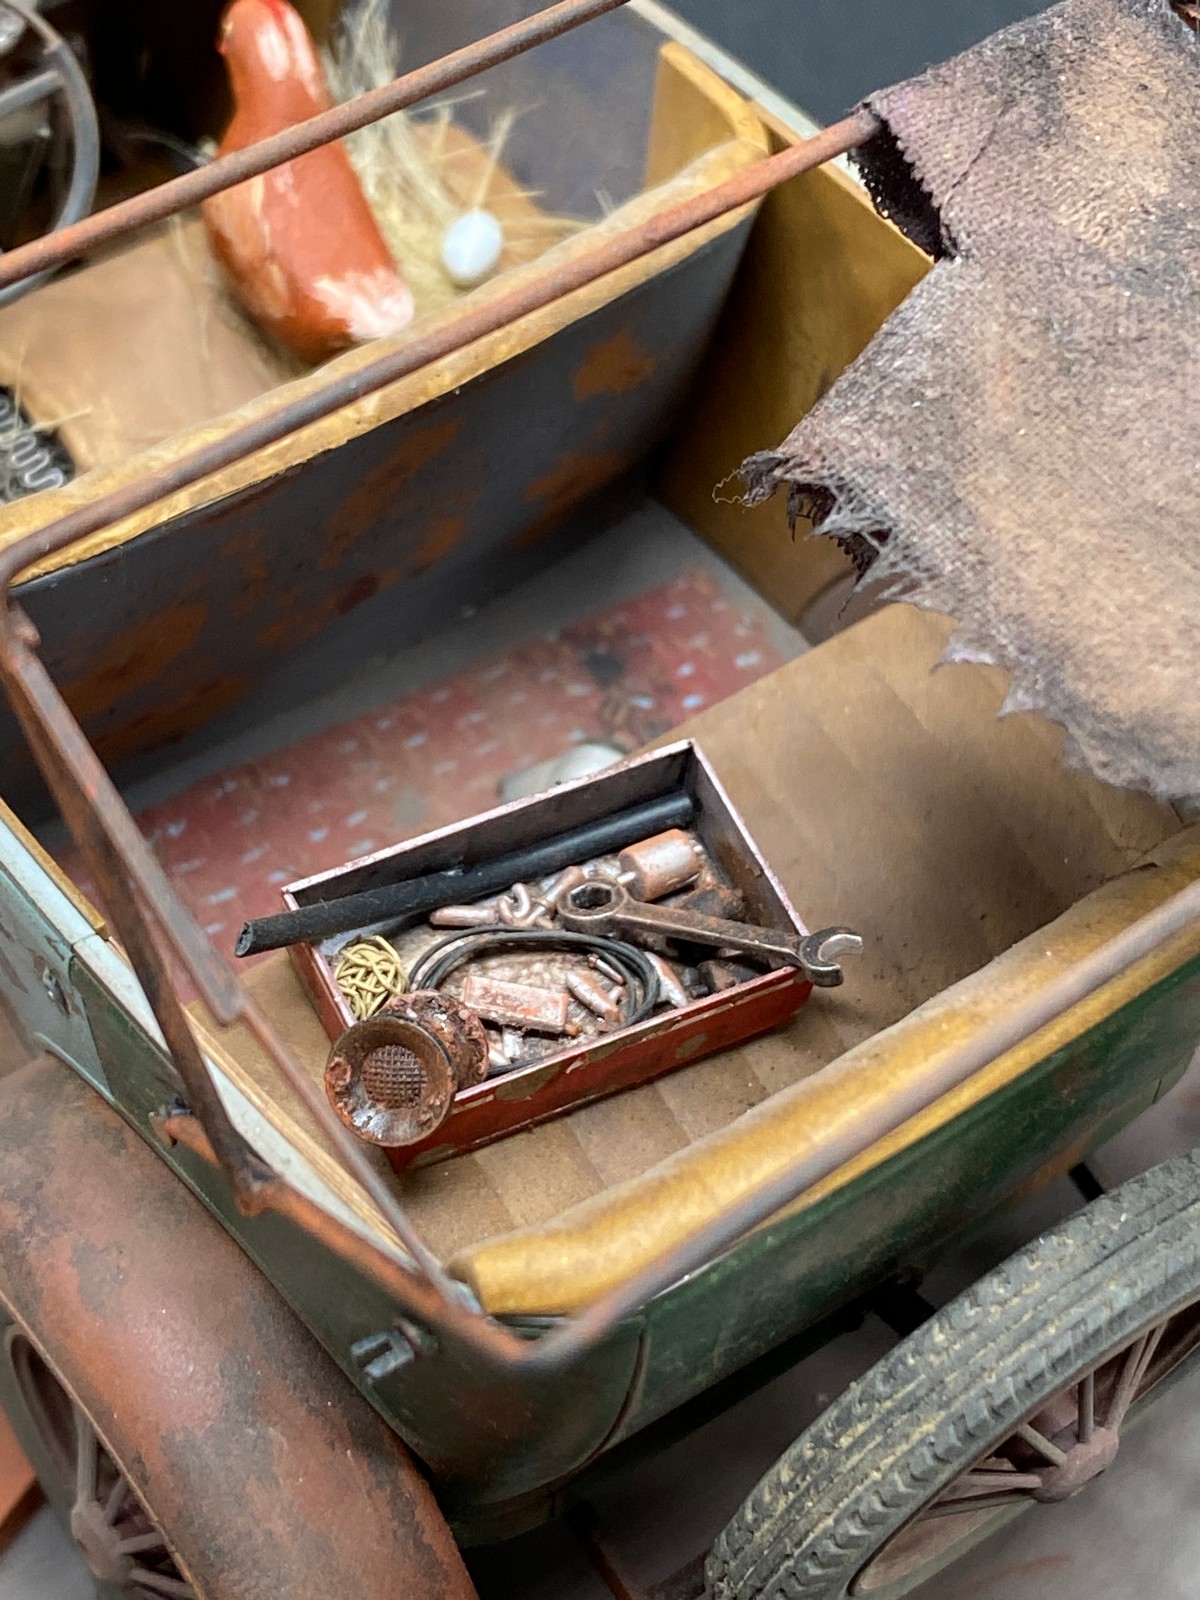
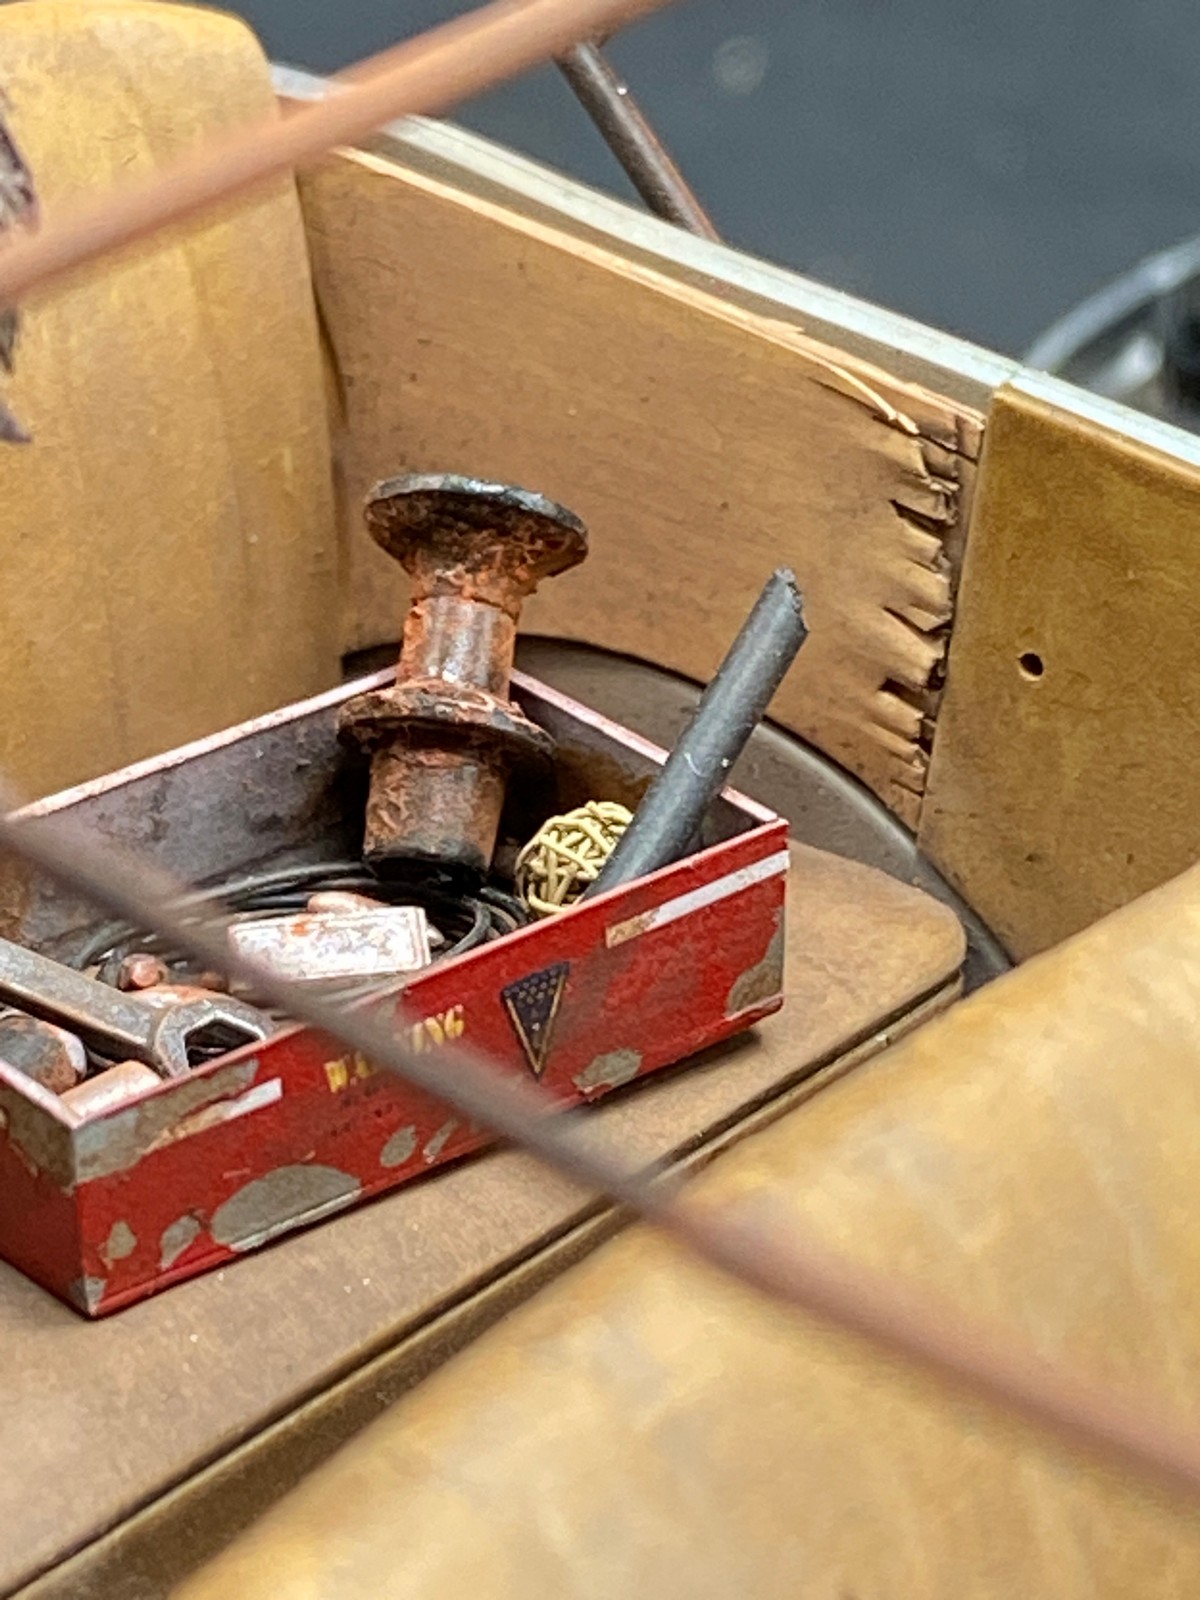
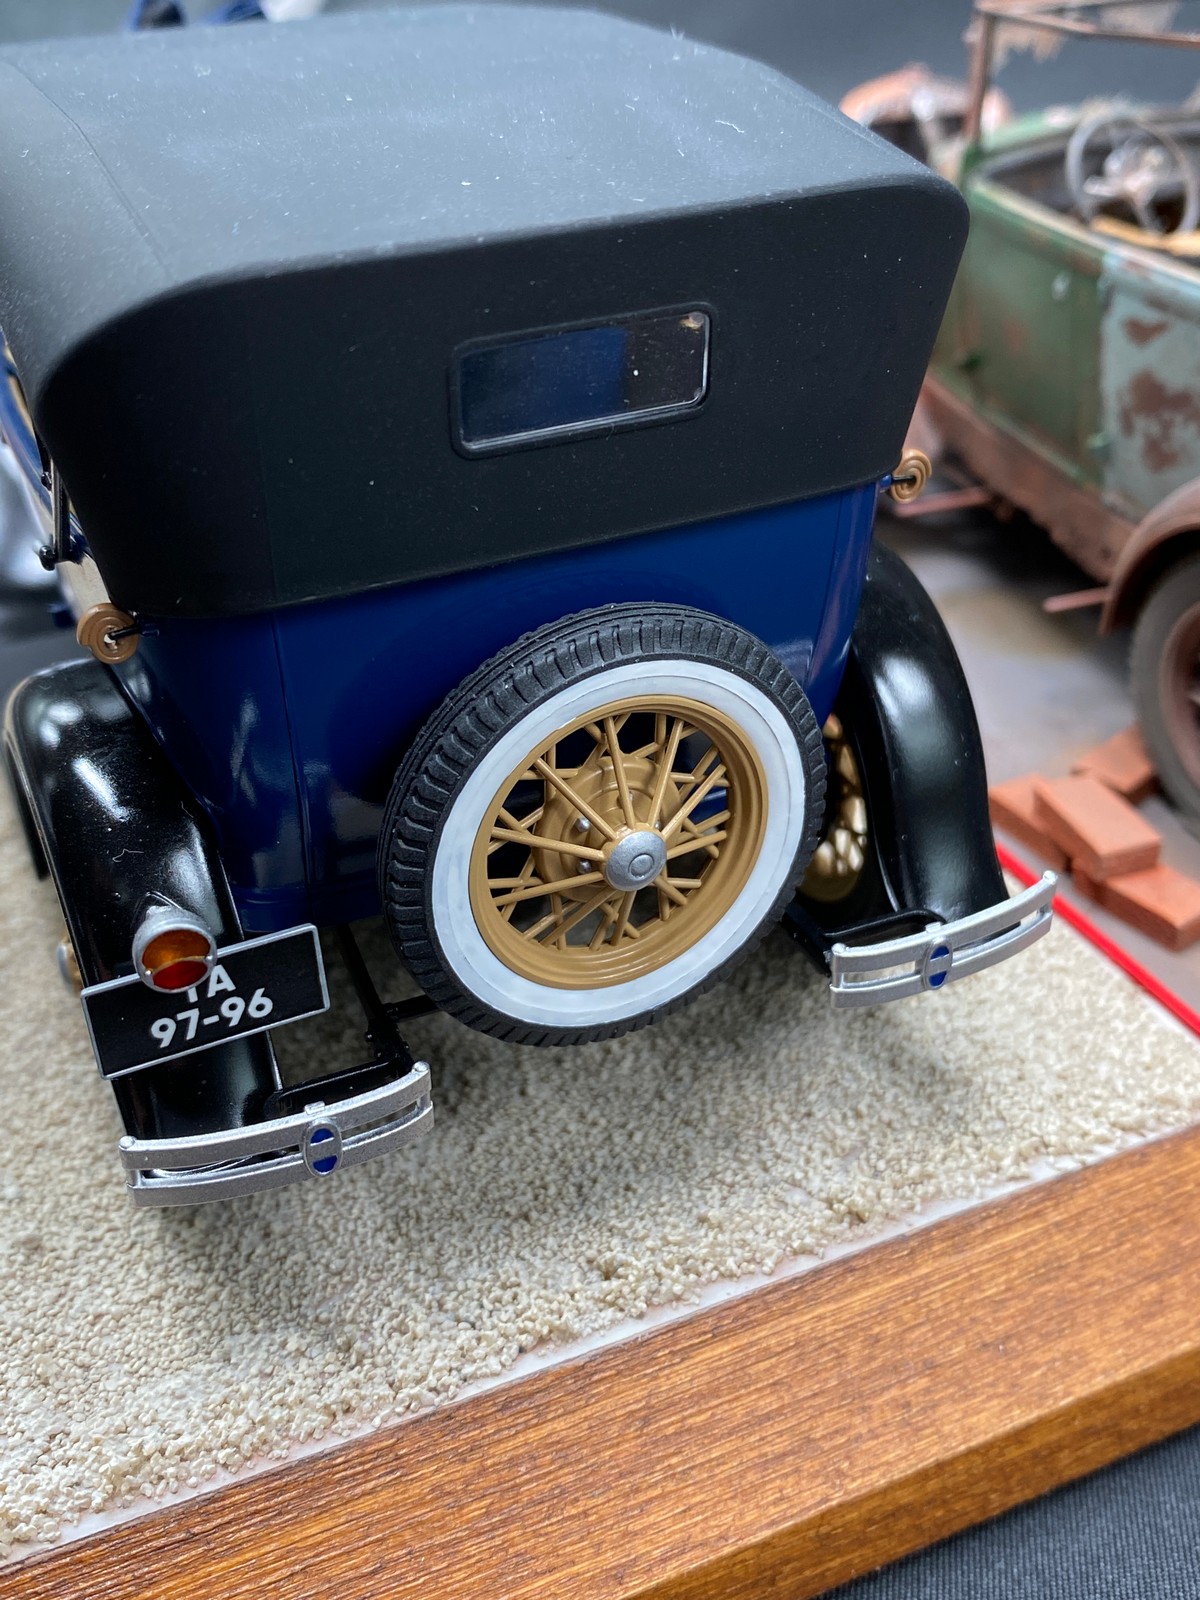
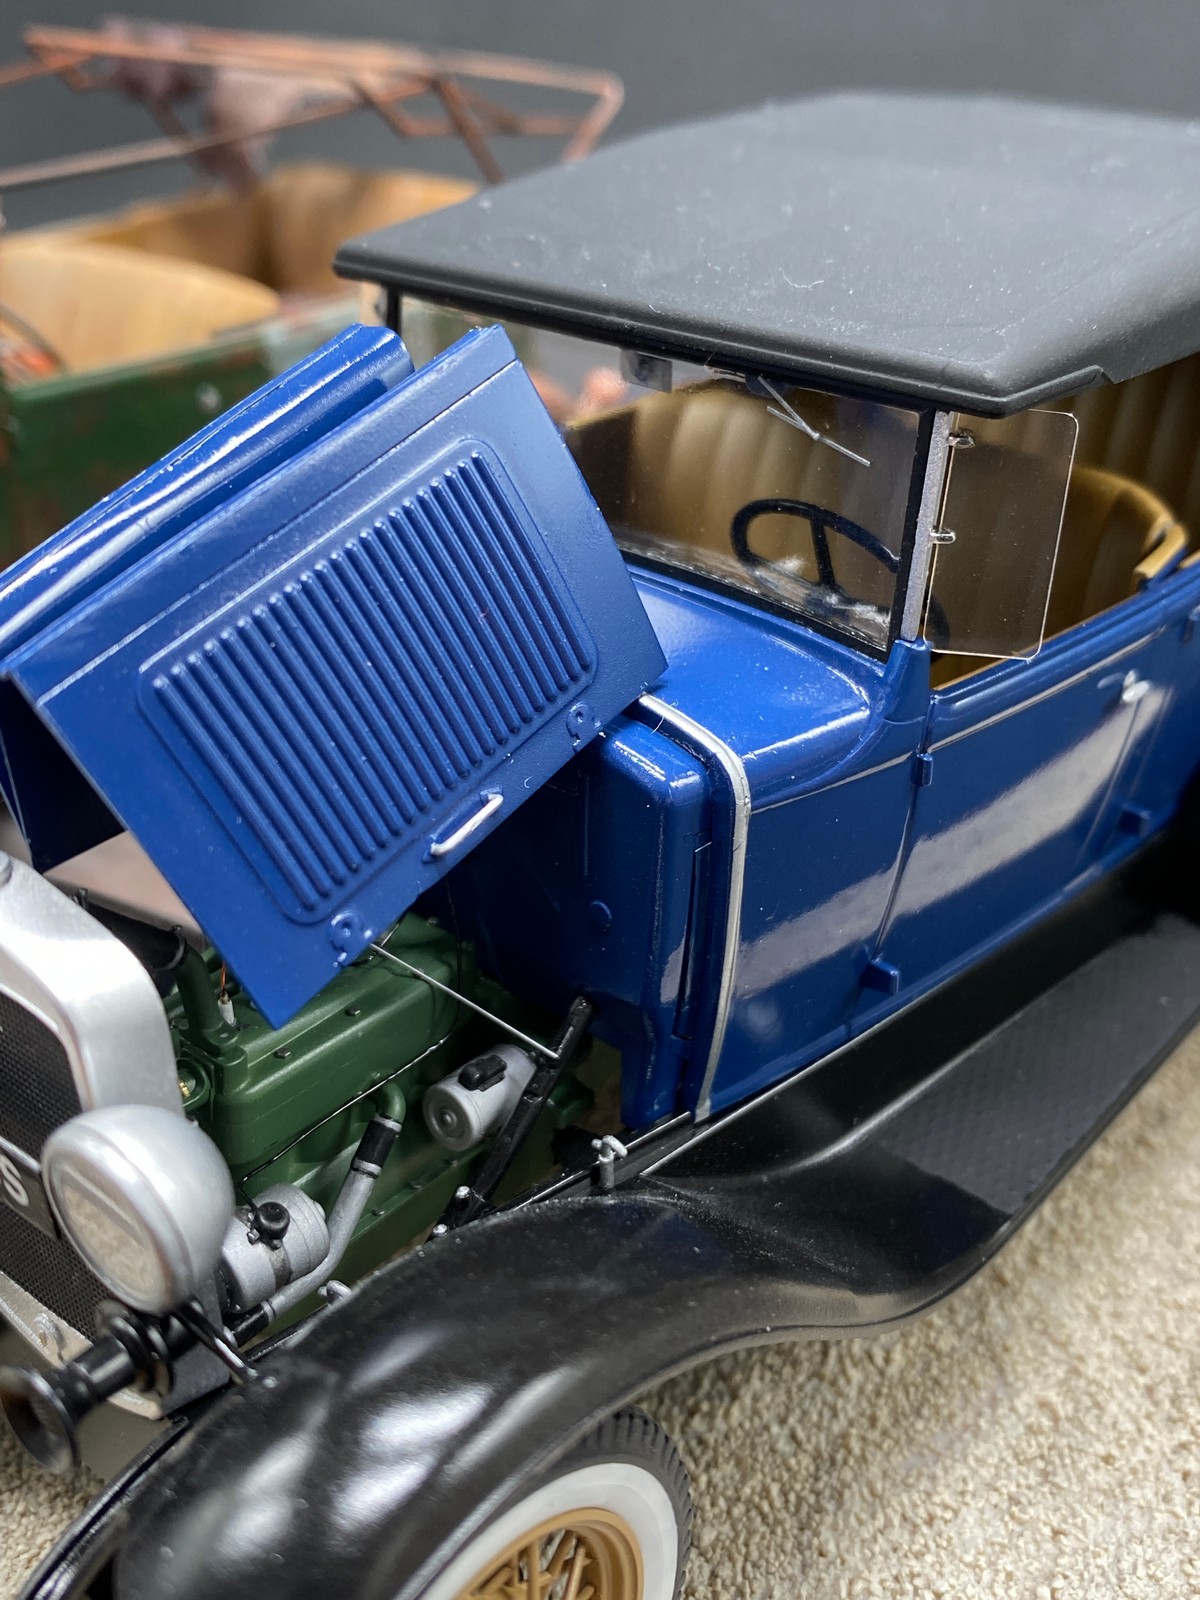
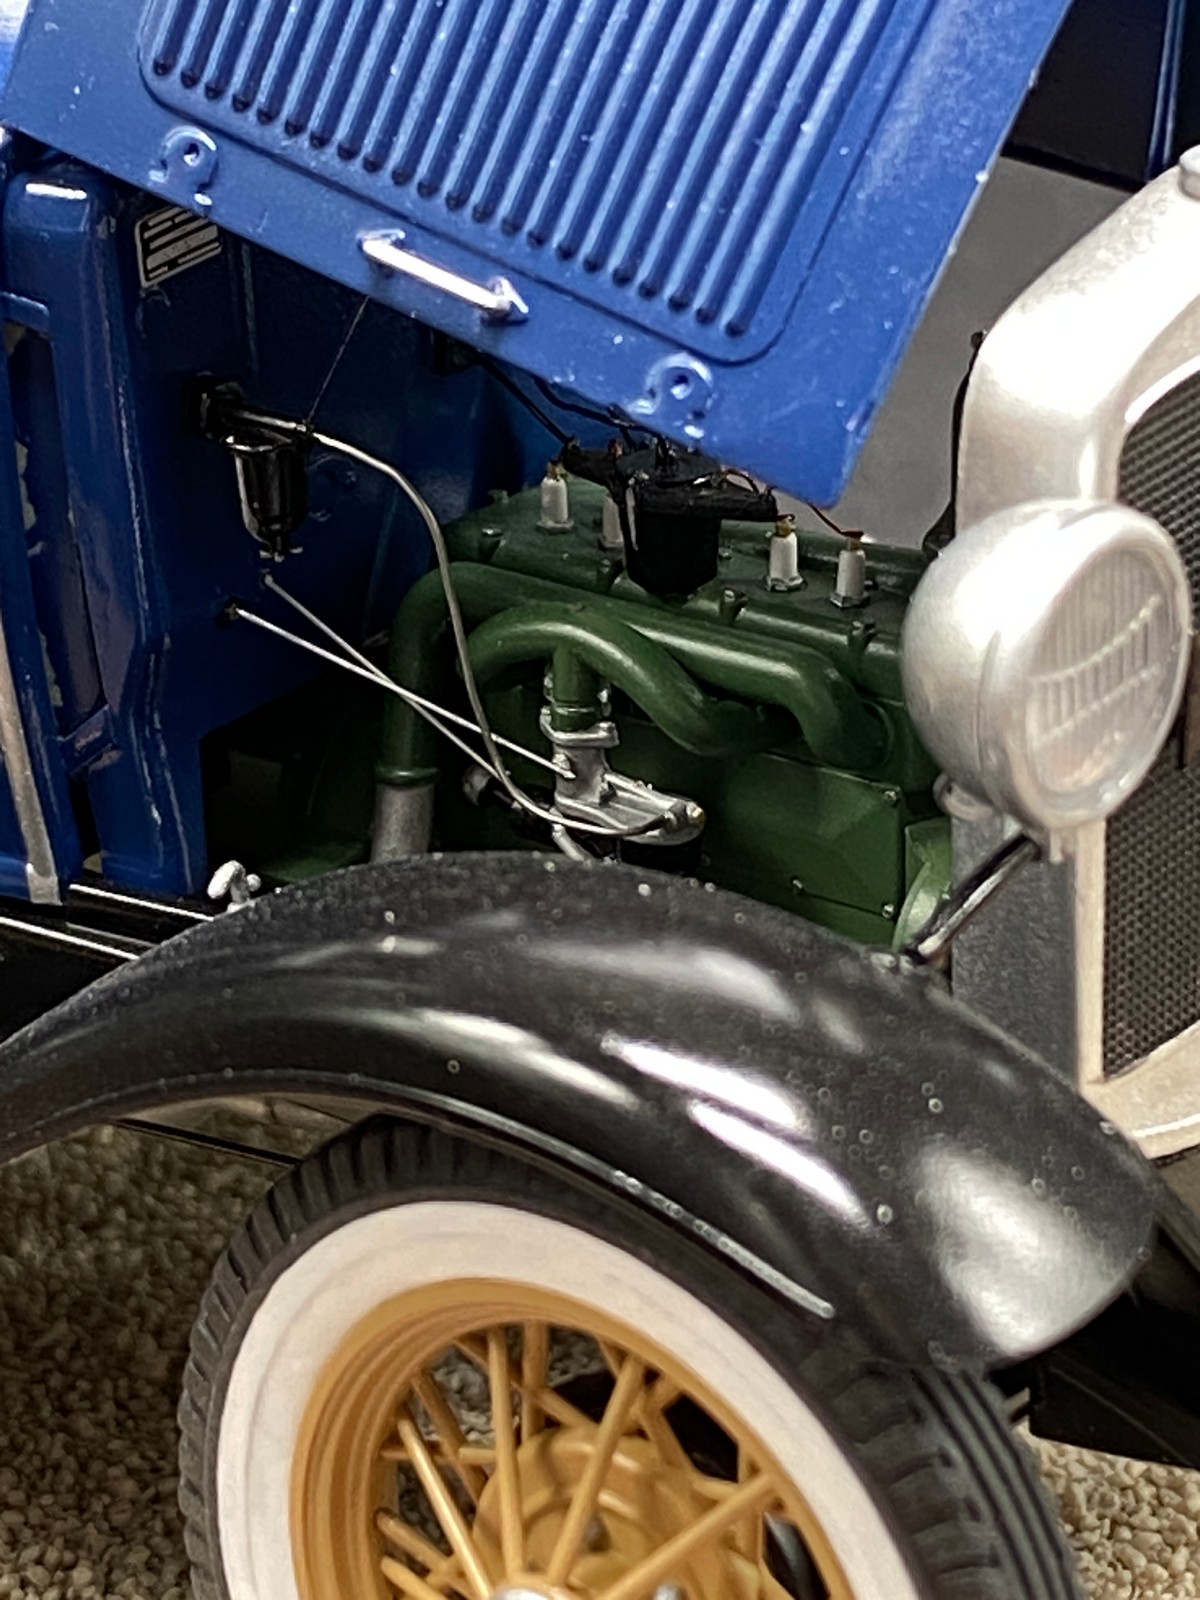
Working on the model turned out to be more complicated than I expected. Removing a part usually means that you have to make another part that was covered by the removed part. So when I remove a wheel, I have to make its drum with screws. When I remove a floor part, I have to finish the parts that are covered by the floor and therefore not in the kit. A similar problem occurred when I decided to remove the engine head - I had to finish the block with pistons and bolts. Removing (cutting off) the V-belt meant grinding a notch in the pulleys. That was quite laborious, but effective. The roof structure without the canvas is made of brass profiles, the springs in the holey seat are made of thin wire, and the split plywood in the left rear part is represented by several thin plastic plates colored alternately as light and dark wood. I created the hen from Magic Sculp putty, so I wouldn't make a living as a sculptor... I was pleasantly surprised by the separately sprayed details - for example, candles or bulbs for the headlights.
I thoroughly enjoyed the build. Apart from the almost ubiquitous dividing lines, this is a very nice kit that assembles well and has enough small details to bring the model to life.